Multi-Asset Journey (Part 1, Setup)
A contextualized user journey to explore and understand the Multi-Asset NFT features
In this journey we will explore the main features of Multi-Asset standard. We will use Ready to Use implementation for Multi-Asset with PreMint. For more information on the available implementations see the implementations section. We have chosen the PreMint implementation because it allows us, contract owners, to mint tokens at no cost.
The use cases that will be explored are:
- Creation of an NFT collection that supports asset binding.
- Creation of assets to addition to the NFTs of the collection.
- Asset replacement.
- NFT burning (with relative bound assets).
We will guide you through the process using both Remix and Hardhat, starting from the code wizard in each case. Interactions will be done from either Remix or hardhat scripts.
User journey context
Expert chefs Master and his student Alice are traveling the world to develop unique recipes. Their goal is to create a renowned cookbook showcasing their culinary innovations.
Creating the Smart Contract.
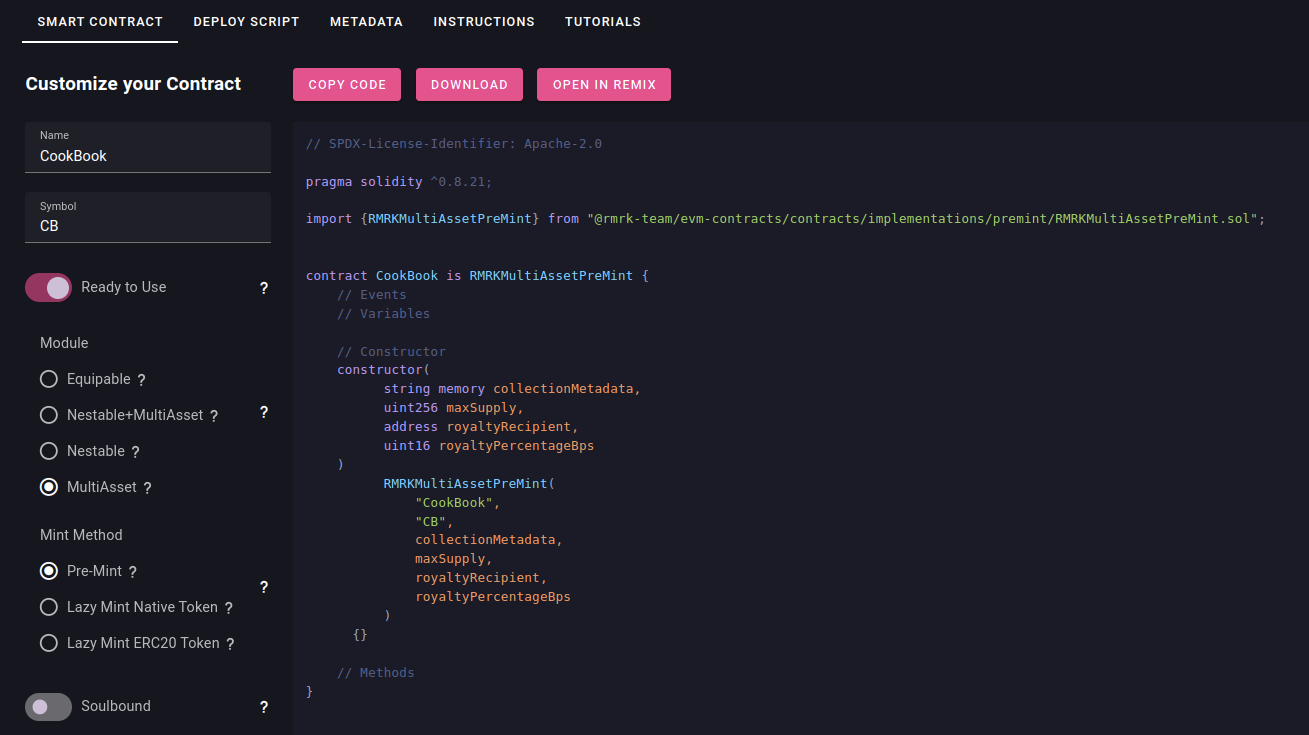
Let's start by going to the wizard.rmrk.dev (opens in a new tab) and configuring our contract.
- Set the name to "CookBook"
- Set the symbol "CB"
- Select Module to be MultiAsset
- Select Mint Method to Pre-Mint
Here you can decide to either use Remix or Hardhat. Remix requires no installation, but Hardhat version will take care of verifying the contract and adding it to Singular (opens in a new tab) marketplace, it also allows you to deploy the contracts locally and create unit tests if needed.
Open in Remix
Click Open in Remix and you will be redirected to Remix with the contract already loaded, installing all the packages might take a few minutes. You should then see a screen like this.
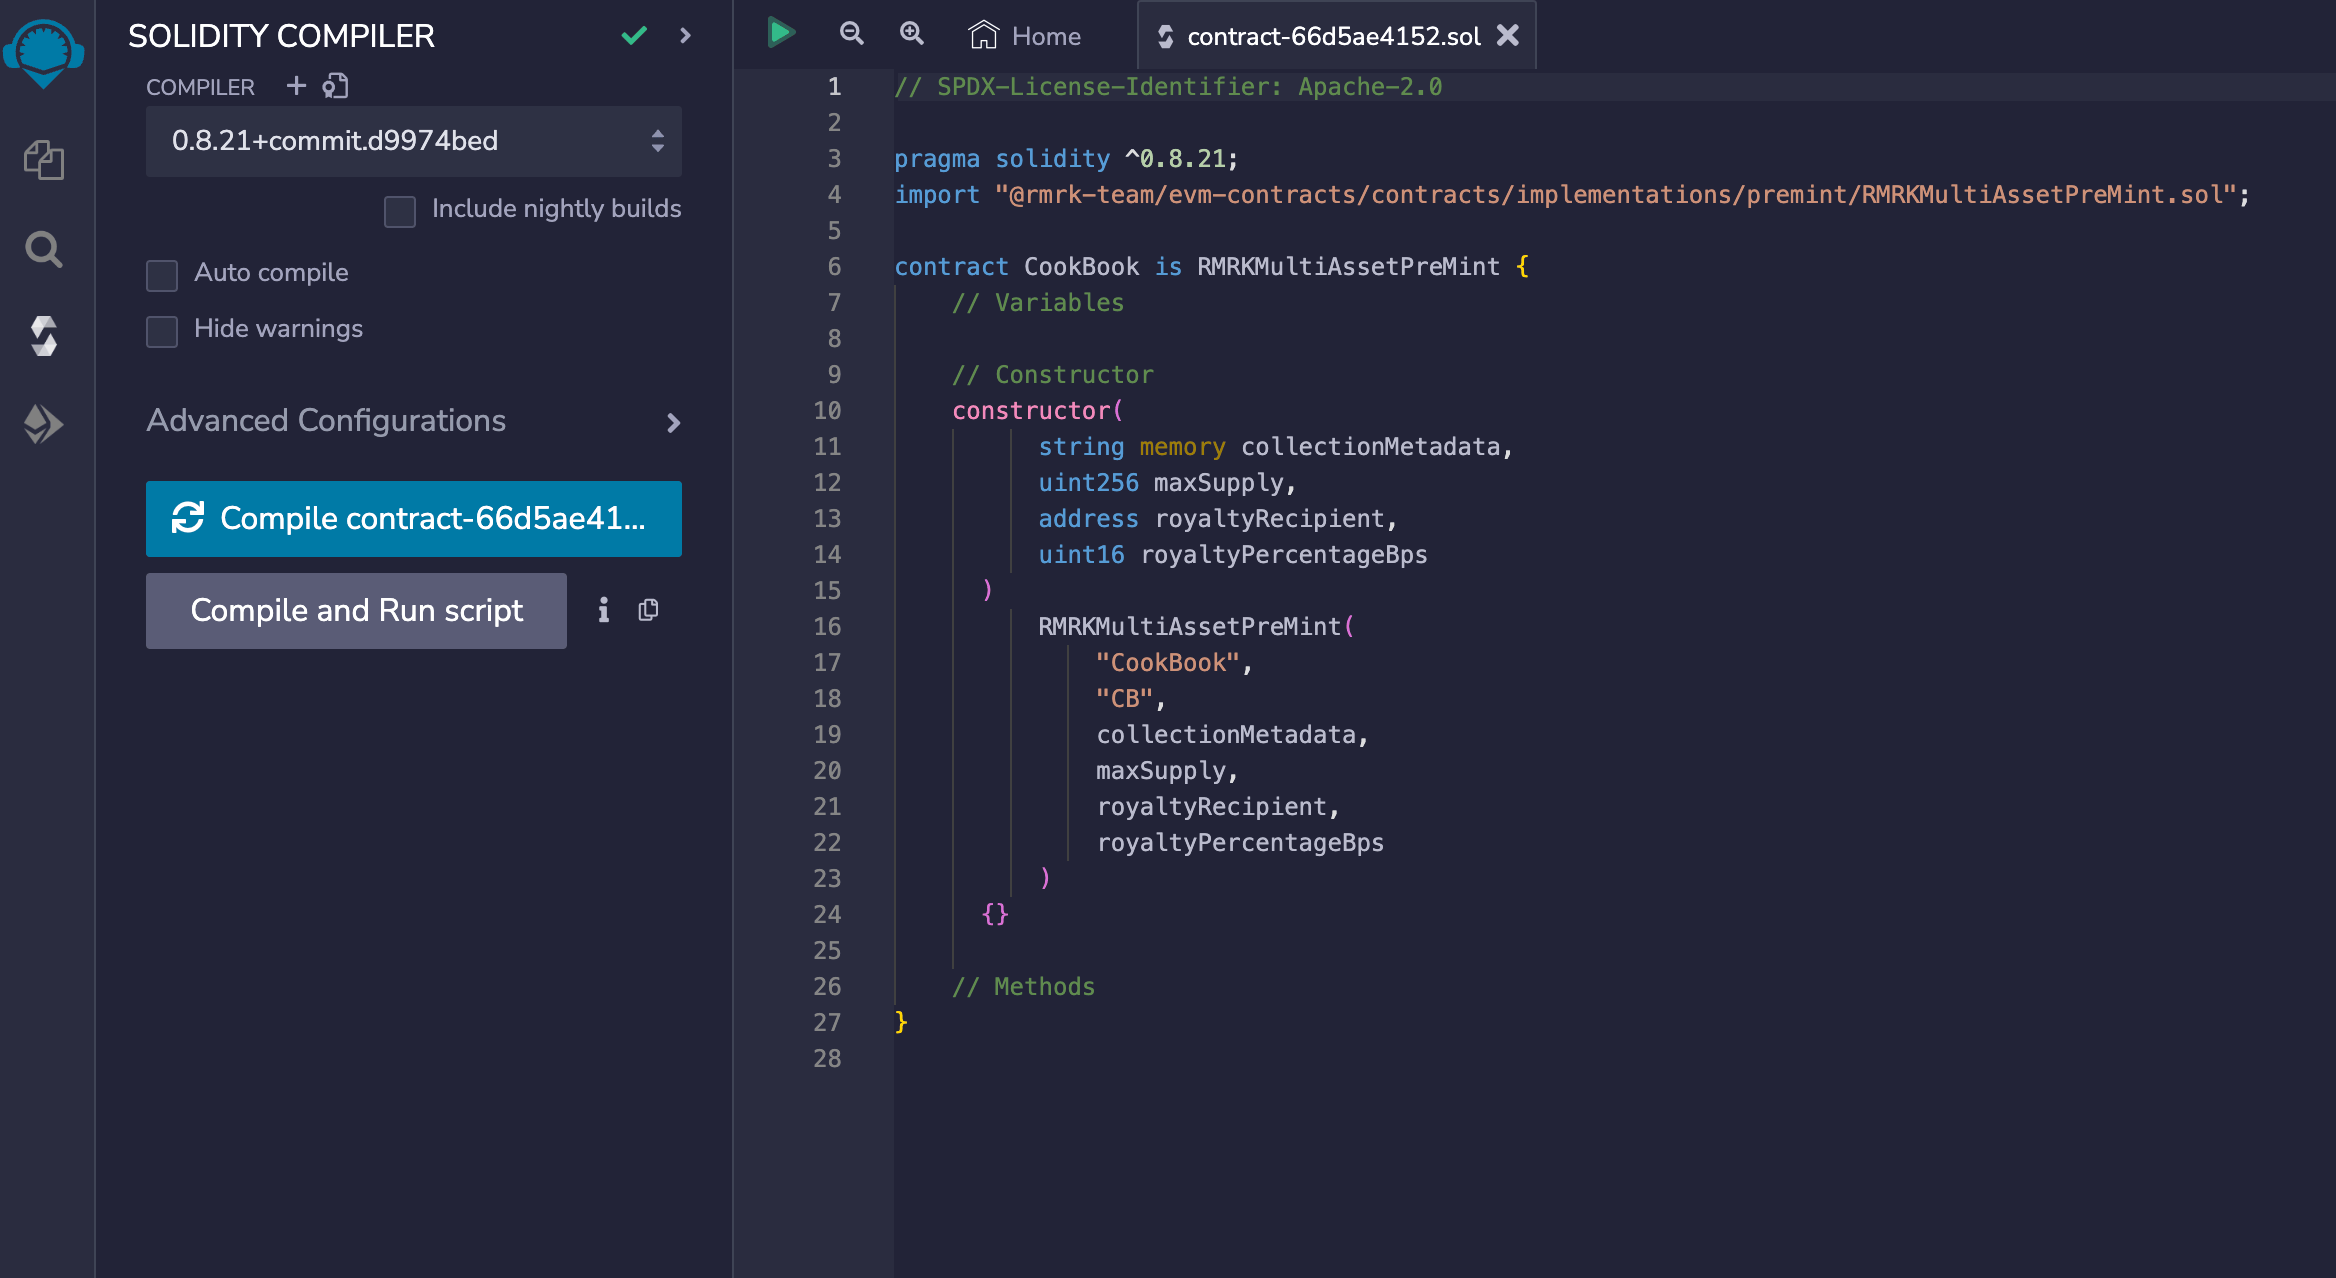
Compile the contract
Hit Compile button and wait for it to process.
Configure the deployment
- Go to the Deploy section on the left.
- In the Environment dropdown, select Injected Provider to use your wallet to deploy the contract.

Make sure you have the right network selected on your wallet, we recommend to use a test network. In this case we are using Moonbase Alpha (opens in a new tab).
Fill in the deployment data
Expand the deploy section and fill in all the data.
- Collection Metadata:
ipfs://QmSU2R1ewXA7vmxD17KQTLRG1nu63KPxDmnb6xdtZ2Hmq5 - Max supply: 100
- Royalty receipient: Your address
- Royalty percentage: 500 * This is 5% in Base Points.
Your screen should look like this:

Deploy the contract
- Hit transact and confirm the transaction on your wallet.
- Your deployed contract will show on the Deployed Contracts section, where you can interact with it.
Congratulations!
You have deployed your first Multi-Asset contract. We will refer to the account used for deployment as "Master". Additionally, a secondary account will be required for certain interactions, which we will name "Alice".
Optionally you can add your collection to Singular. See the Adding Collection to Singular tutorial for more information.
Great work on completing Part 1! Now, get ready for Part 2, where things get even more exciting.