Nestable-Asset Journey ( Part 1, Kingdom )
A contextualized user journey to explore and understand the Nestable NFT features
In this journey we will explore the main features of Nestable standard. We will use Ready to Use implementation for Nestable with PreMint. For more information on the available implementations see the implementations section. We have chosen the PreMint implementation because it allows us to mint tokens at no cost. We will be using 3 contracts: Kingdom, Army and Soldier.
The use cases that will be explored are:
- Creation of a multi-level NFTs hierarchy.
- Transferring of NFTs between hierarchy owners and/or hierarchy levels.
- Burning NFTs at different hierarchy levels.
We will guide you through the process using both Remix and Hardhat, starting from the code wizard in each case. Interactions will be done from either Remix or hardhat scripts.
User journey context
We are in the Medieval epoch and in the universe there is an omnipotent and all-powerful Wizard. During a special day, the wizard decided to create two kings, each one with their own Kingdom and then he allowed the kings to govern their kingdoms. Every action that unfolded later is included in the user journey. Have fun and happy learning!
Creating the Kingdom Contract.
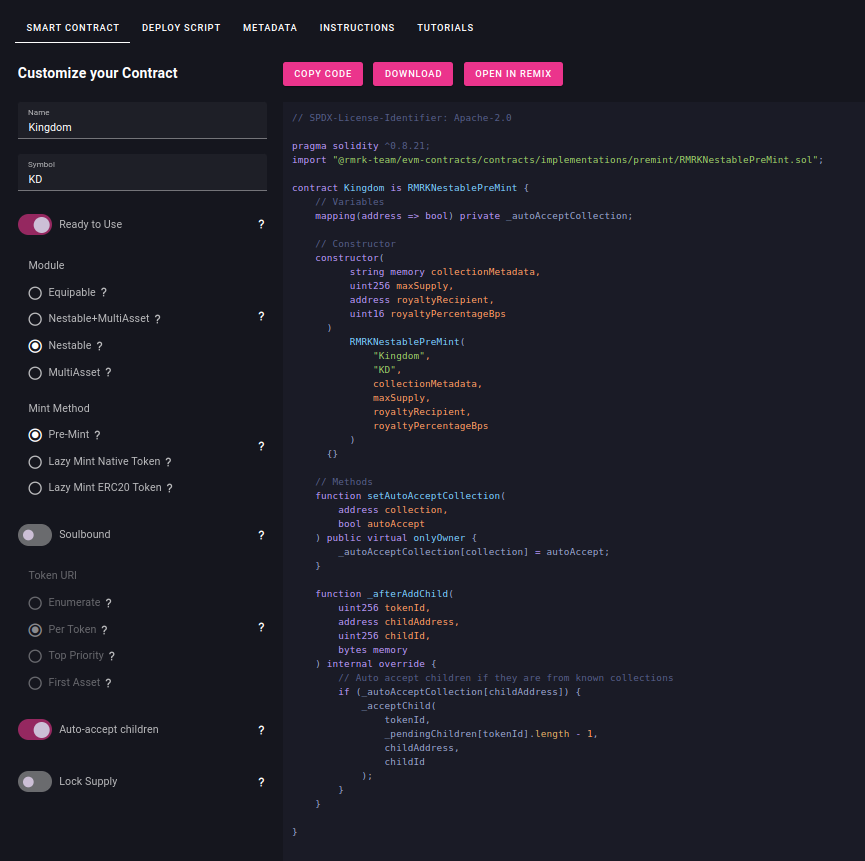
Let's start by going to the wizard.rmrk.dev (opens in a new tab) and configuring our contracts.
- Set the name to "Kingdom"
- Set the symbol "KD"
- Select Module to be Nestable
- Select Mint Method to Pre-Mint
- Activate the Auto-accept children option, we will use it so armies are automatically accepted into the kingdom.
Here you can decide to either use Remix or Hardhat. Remix requires no installation, but Hardhat version will take care of verifying the contract and adding it to Singular (opens in a new tab) marketplace, it also allows you to deploy the contracts locally and create unit tests if needed.
Open in Remix
Click Open in Remix and you will be redirected to Remix with the contract already loaded, installing all the packages might take a few minutes. You should then see a screen like this.
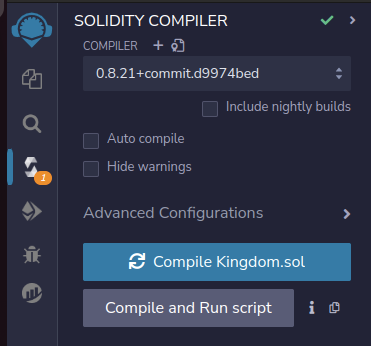
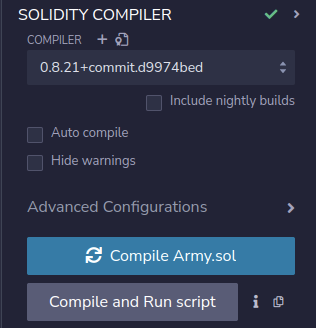
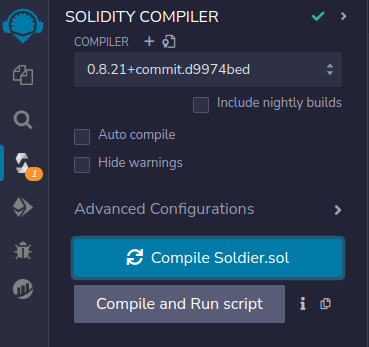
Compile the contract
Hit Compile button and wait for it to process.
Configure the deployment
- Go to the Deploy section on the left.
- In the Environment dropdown, select Injected Provider to use your wallet to deploy the contract.
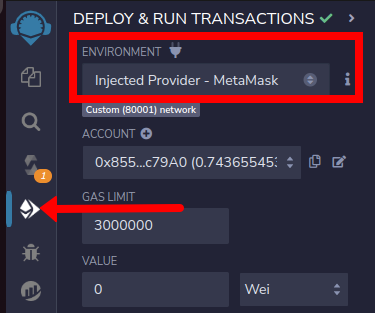
Make sure you have the right network selected on your wallet, we recommend to use a test network. In this case we are using Polygon Mumbai (opens in a new tab).
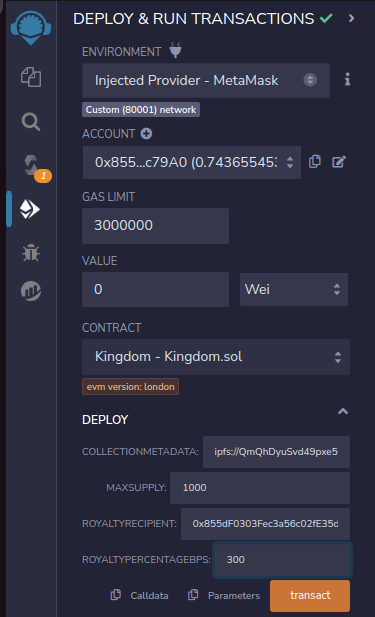
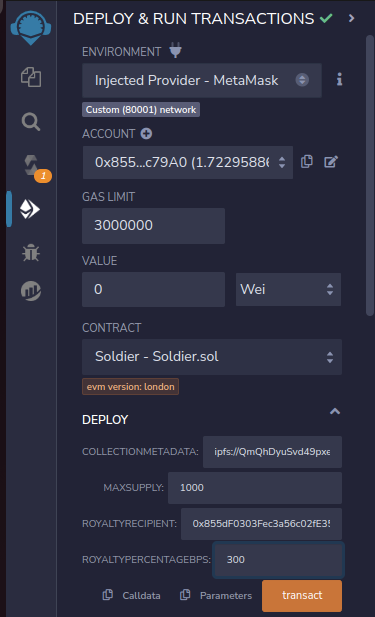
Fill in the deployment data
Expand the deploy section and fill in all the data.
- Collection Metadata:
ipfs://QmQhDyuSvd49pxe5v2KnmvWT39TFyoqEQyBkhjYC7imHUs/kingdom/collection.json - Max supply: 1000
- Royalty receipient: Your address
- Royalty percentage: 300 * This is 3% in Base Points.
Your screen should look like this:
Deploy the contract
- Hit transact and confirm the transaction on your wallet.
- Your deployed contract will show on the Deployed Contracts section, where you can interact with it.
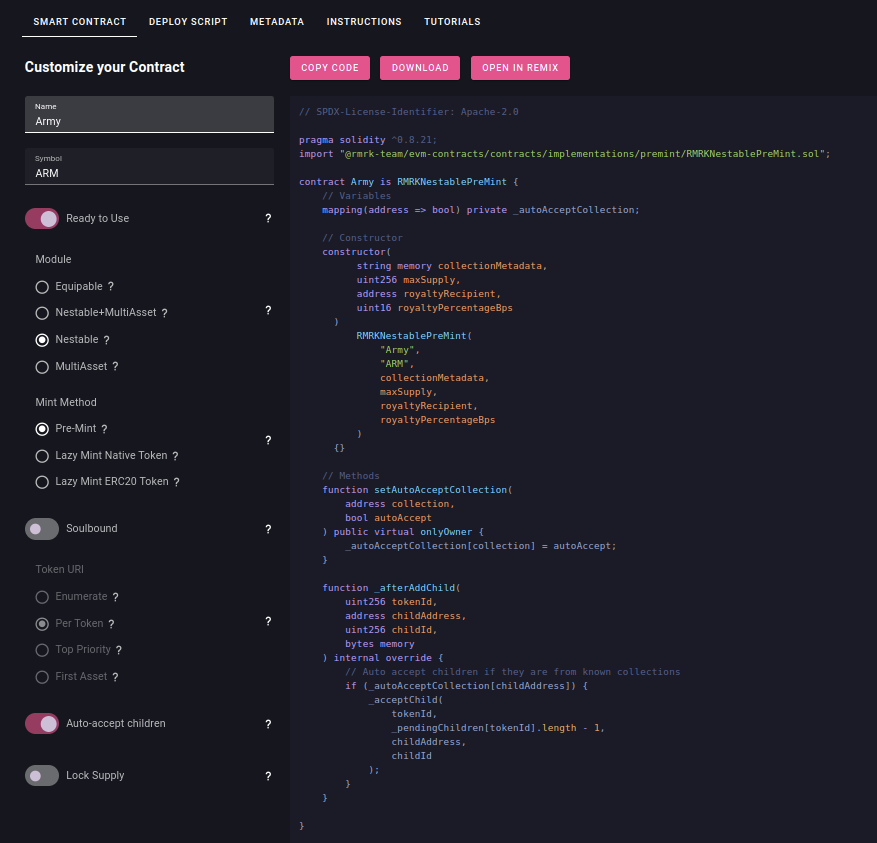
Prepare Army contract
Back to the wizard.rmrk.dev (opens in a new tab).
- Set the name to "Army"
- Set the symbol "ARM"
- Select Module to be Nestable
- Select Mint Method to Pre-Mint
- Activate the Auto-accept children option, we will use it so soldiers are automatically accepted into the army.
Open in Remix and compile
Click Open in Remix and you will be redirected to Remix with the contract already loaded. Remix keeps data about your session so you should now have both contracts. You may rename them to make it easier to identify them.
With the Army contract open, hit Compile button and wait for it to process.
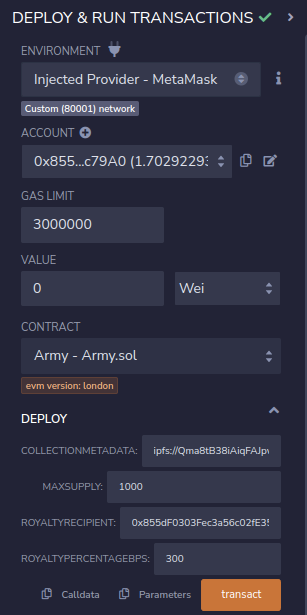
Fill in the deployment data
- Go to the Deploy section on the left and expand the deploy section and fill in all the data.
- Collection Metadata:
ipfs://Qma8tB38iAiqFAJpwz55d7sRQx4q7zZq1gzXkkK9wjehCg/collection.json - Max supply: 1000
- Royalty receipient: Your address
- Royalty percentage: 300 * This is 3% in Base Points.
- Collection Metadata:
Your screen should look like this:
Deploy the contract
- Hit transact and confirm the transaction on your wallet.
- Your deployed contract will show on the Deployed Contracts section, where you can interact with it.
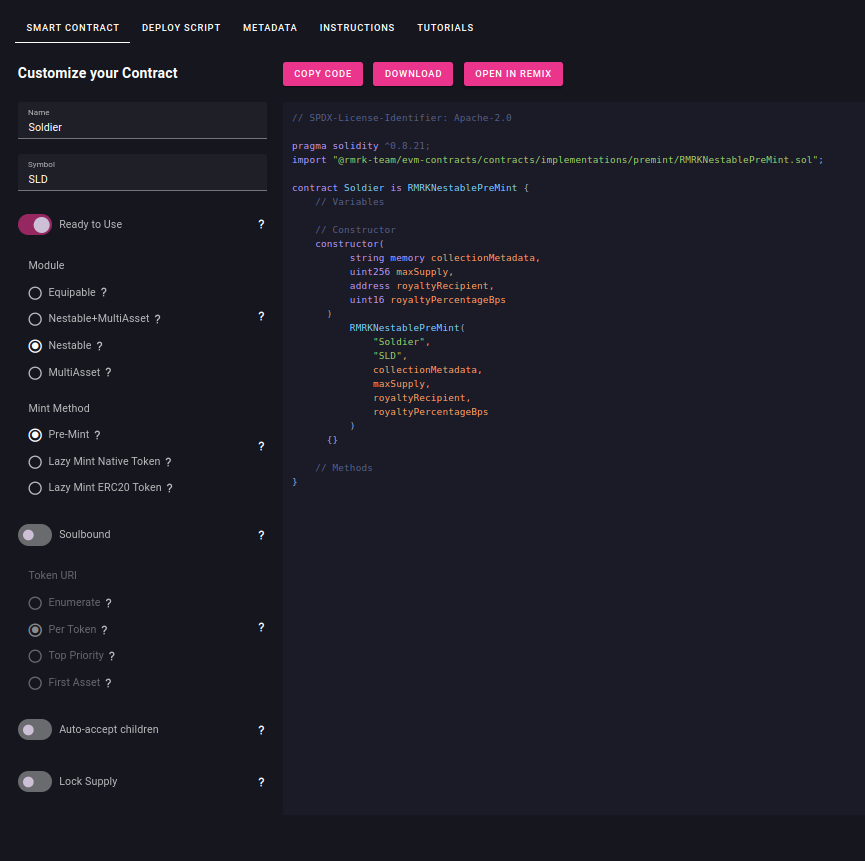
Prepare Soldier contract
Back to the wizard.rmrk.dev (opens in a new tab).
- Set the name to "Soldier"
- Set the symbol "SD"
- Select Module to be Nestable
- Select Mint Method to Pre-Mint
- Disable the Auto-accept children option, we will not need it for this contract.
Open in Remix and compile
Click Open in Remix and you will be redirected to Remix with the contract already loaded. Remix keeps data about your session so you should now have the 3 contracts. Remember to rename the files to make it easier to identify them.
With the Soldiers contract open, hit Compile button and wait for it to process.
Fill in the deployment data
- Go to the Deploy section on the left and expand the deploy section and fill in all the data.
- Collection Metadata:
ipfs://QmQhDyuSvd49pxe5v2KnmvWT39TFyoqEQyBkhjYC7imHUs/soldiers/collection.json - Max supply: 1000
- Royalty receipient: Your address
- Royalty percentage: 300 * This is 3% in Base Points.
- Collection Metadata:
Your screen should look like this:
Deploy the contract
- Hit transact and confirm the transaction on your wallet.
- Your deployed contract will show on the Deployed Contracts section, where you can interact with it.
If all went well, you should see the 3 contracts under the Deployed contracts section:
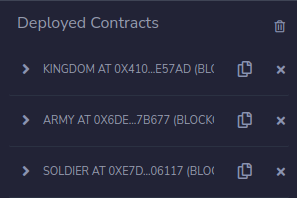
Congratulations!
You have deployed your first Nestable contracts. For practical reasons we will be doing all the operations with the same account.
Optionally you can add your collection to Singular. See the Adding Collection to Singular tutorial for more information.
Prepare contract interaction scripts
We can do every step without further coding, by using the deployed contracts section on Remix, as we did on MultiAsset Journey. However, since there are several operations and some of involve reading the state and finding the children indexes, we will use a script to interact with the contracts.
-
Create a
run-journey.tsfile under thescriptsfolder. We will start by importing some libraries and our method to get the contracts. All the code will run under themainfunction. We will simply log the account and the addresses of the kingdom and soldier contracts, to make sure they are as expected. -
Add the following code to the
run-journey.tsfile:
import {ethers} from 'ethers'
;(async function () {
    try {
        const kingdomMetadata = JSON.parse(
            await remix.call(
                'fileManager',
                'getFile',
                'browser/artifacts/Kingdom.json'
            )
        )
        const armyMetadata = JSON.parse(
            await remix.call(
                'fileManager',
                'getFile',
                'browser/artifacts/Army.json'
            )
        )
        const soldierMetadata = JSON.parse(
            await remix.call(
                'fileManager',
                'getFile',
                'browser/artifacts/Soldier.json'
            )
        )

        const wizard = new ethers.providers.Web3Provider(
            web3Provider
        ).getSigner()

        // Create an instance of a Contract Factory
        const kingdomFactory = new ethers.ContractFactory(
            kingdomMetadata.abi,
            kingdomMetadata.data.bytecode.object,
            wizard
        )
        const kingdom = kingdomFactory.attach(
            '0xAC2D51fE04853eD784282744167c9568C065708E'
        )

        const armyFactory = new ethers.ContractFactory(
            armyMetadata.abi,
            armyMetadata.data.bytecode.object,
            wizard
        )
        const army = armyFactory.attach(
            '0x735C40D5C71A9024AAFf1F667551Def02C549FaC'
        )

        const soldierFactory = new ethers.ContractFactory(
            soldierMetadata.abi,
            soldierMetadata.data.bytecode.object,
            wizard
        )
        const soldier = soldierFactory.attach(
            '0x3FaA4C4824790a48c67888cc54FfE5b3C729f870'
        )

        const wizardAddress = await wizard.getAddress()
        console.log(`Running journey with account: ${wizardAddress}`)
        console.log(`Using Kingdom deployed at ${kingdom.address}`)
        console.log(`Using Army deployed at ${army.address}`)
        console.log(`Using Soldier deployed at ${soldier.address}`)

        // Journey starts here:
    } catch (e) {
        console.log(e.message)
    }
})()Make sure you replace the 3 contract addresses for the ones you just deployed. You can find them on the Deploy & Run Menu, below Deployed Contracts.
Run the script
You can safely run the script since there will be no interactions. It will use the account you connected to deploy your contracts. From the File Explorer, right click on the script and hit Run.You should see a similar output:
Running journey with account: 0x855dF0303Fec3a56c02fE35d8fb4d5e80A8c79A0
Using Kingdom deployed at 0x410EeA6EF48bA0f54F925BC01665D732203E57Ad
Using Army deployed at 0x6dE36644b5B73106c99C43a2669ae93b5d37b677
Using Soldier deployed at 0xE7dBc708fC483882c88bb0f86628f90Ef6A06117
Great work on completing Part 1! Now, get ready for Part 2, where things get even more exciting.